Review Periods
Defines both the time range of performance data to be evaluated and the timeframe during which the review process takes place.
Once the Review Criteria have been prepared, the next step is to create a Review Period.
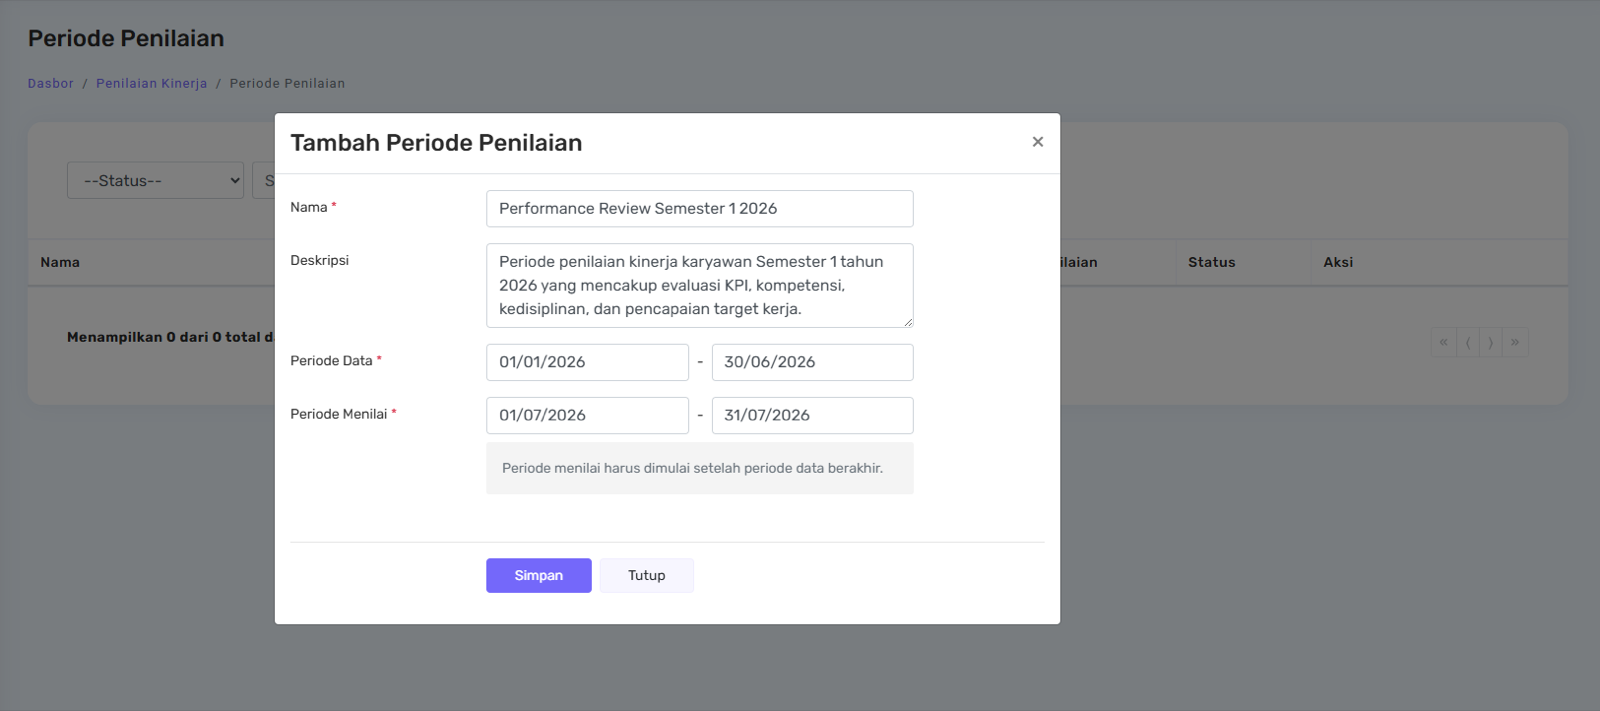
To create a new Review Period, click Add Review Period, then complete the following information:
- Name
- Description
- Data Period
- Review Period
Once all the information is filled in, click Save.
Understanding the Data Period and Review Period
Before creating a Review Period, it is important to understand the difference between the two.
- Data Period is the timeframe of employee performance data that will be used as the basis for the performance review.
- Review Period is the timeframe during which reviewers conduct employee performance reviews.
Note:
To ensure an effective review process, the Review Period should begin only after the Data Period has ended. This ensures that all performance data has been finalised and is ready to be used during the review process.
Review Period configuration
After creating a Review Period, you will be automatically redirected to the review period details page. Before the review process can begin, complete the following three configuration steps: Review Criteria, Reviewers, and Status.
1. Review Criteria
The first step is selecting the Review Criteria that will be used for the review period. Simply check the criteria you want to include.
Configure division scope. After selecting the review criteria, administrators can specify which divisions will use each criterion by clicking Set Division. Three scope options are available:
| Option | Description |
|---|---|
| All Divisions | The review criterion applies to every division. |
| Except | The review criterion applies to all divisions except the selected ones. |
| Only | The review criterion applies only to the selected divisions. |
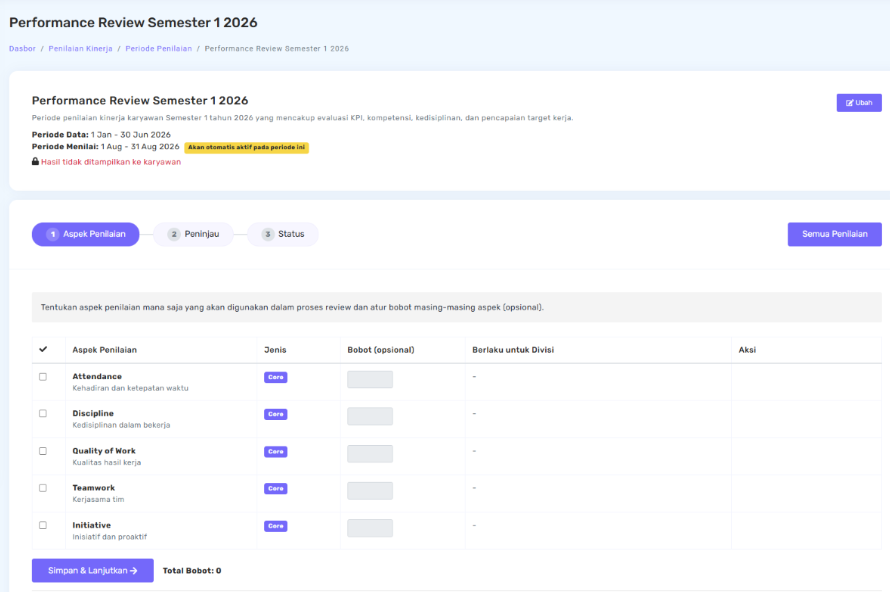
This flexibility allows companies to apply different review criteria for different departments. For example, the Leadership criterion can be assigned only to managerial divisions, while Attendance can apply to all employees.
Configure review weights (optional). Administrators can also assign a Weight to each review criterion. Weights can be entered directly on this page or automatically populated from the Default Weight configured in the Review Criteria menu.
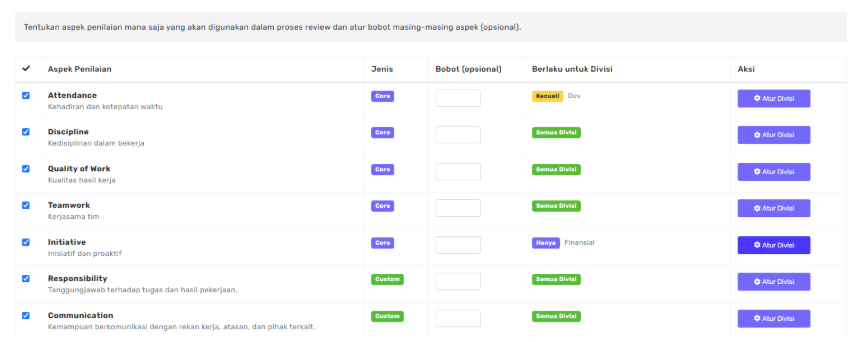
When using review weights, please note the following:
- If all Weight fields are left blank, the system treats every review criterion equally (equal weight).
- If weights are used, every selected review criterion must have a weight assigned.
Overall Rating calculation example. At the bottom of the page, Kerjoo provides an Overall Rating Calculation Example to illustrate how the final score is calculated based on the assigned weights.
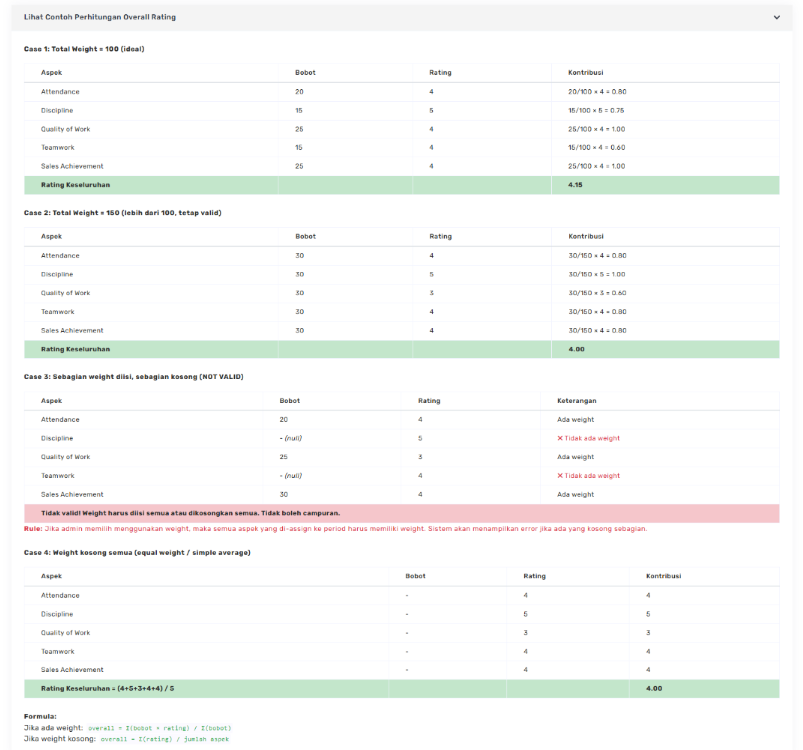
Once the Review Criteria configuration is complete, click Save & Continue.
2. Reviewers
In this step, administrators assign the Reviewer responsible for conducting performance reviews in each division.
By default, Kerjoo assigns the division's Supervisor as the reviewer. If a division has multiple supervisors, the administrator must manually select one of them.
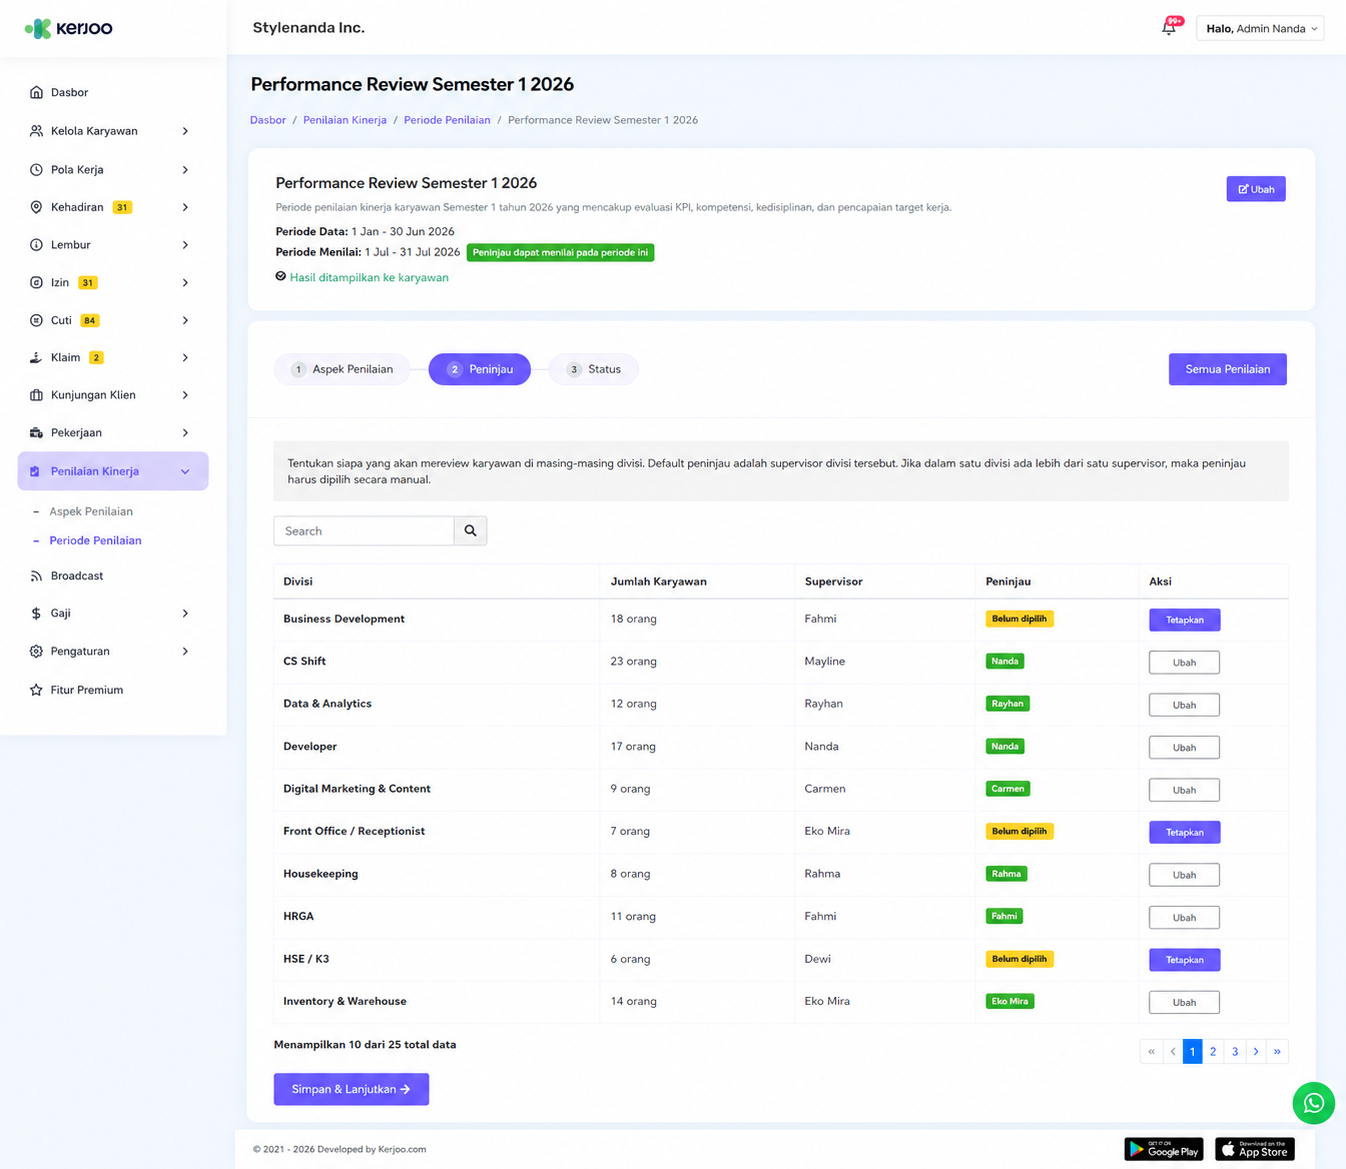
To assign a reviewer:
- Click Assign or Change for the desired division.
- Select the supervisor who will act as the Reviewer.
- Ensure every division has an assigned reviewer.
Click Save & Continue to proceed to the next step.
3. Status
The final configuration step is Status. Here, administrators decide whether employees will be able to view their performance review results.
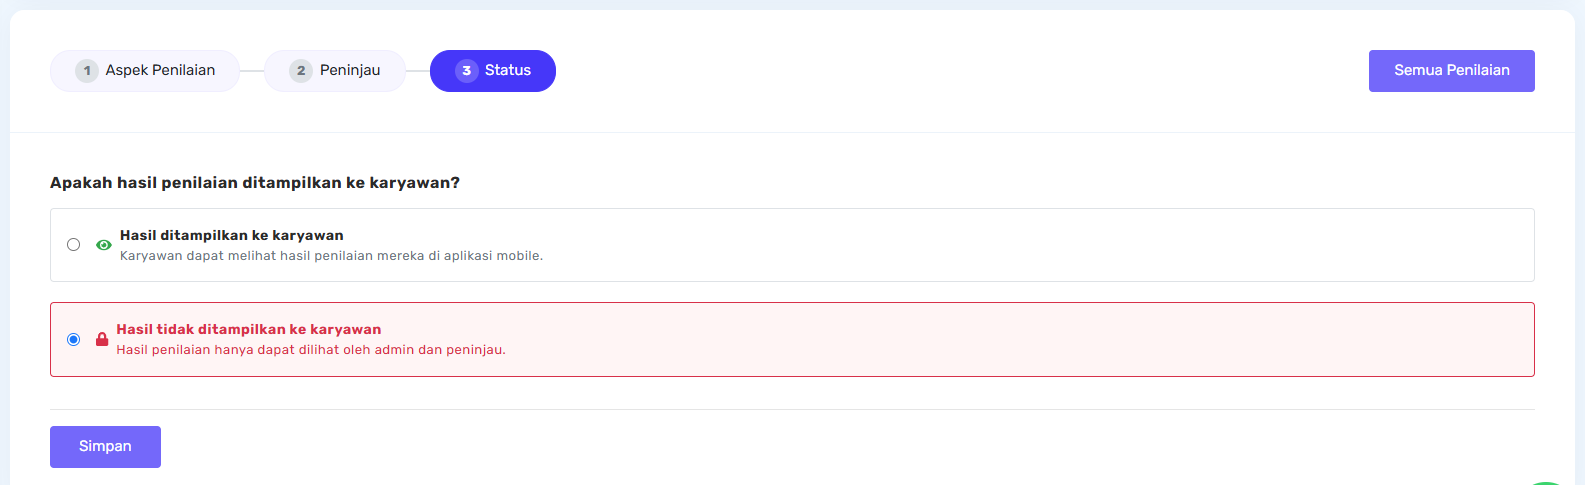
- Select the preferred status based on your company's policy.
- Choose whether the review results should be visible to employees.
- Click Save to complete the review period setup.
Period status after creation
After a Review Period is created, it may not be available immediately.
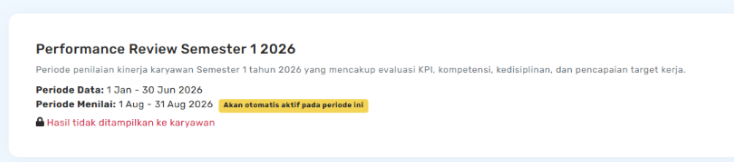
-
If the Review Period has not yet started, the system displays a yellow status labelled "Will be automatically activated during this period". During this time, reviewers cannot submit performance reviews.
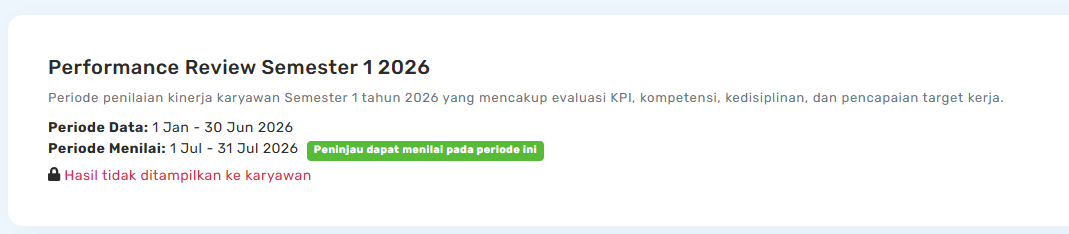
-
Once the Review Period begins, the status automatically changes to green with the message "Reviewers can review during this period". At this stage, reviewers can start conducting Performance Reviews.
Automatic notifications. When the Review Period starts, Kerjoo automatically sends an email and an in-app notification to the assigned reviewers. Additionally, three days before the Review Period ends, the system sends a reminder if there are still employees who have not yet been reviewed, helping ensure that all performance reviews are completed on time.
All Reviews
After the Performance Review process has started, administrators can access all review results in one place through the All Reviews menu.
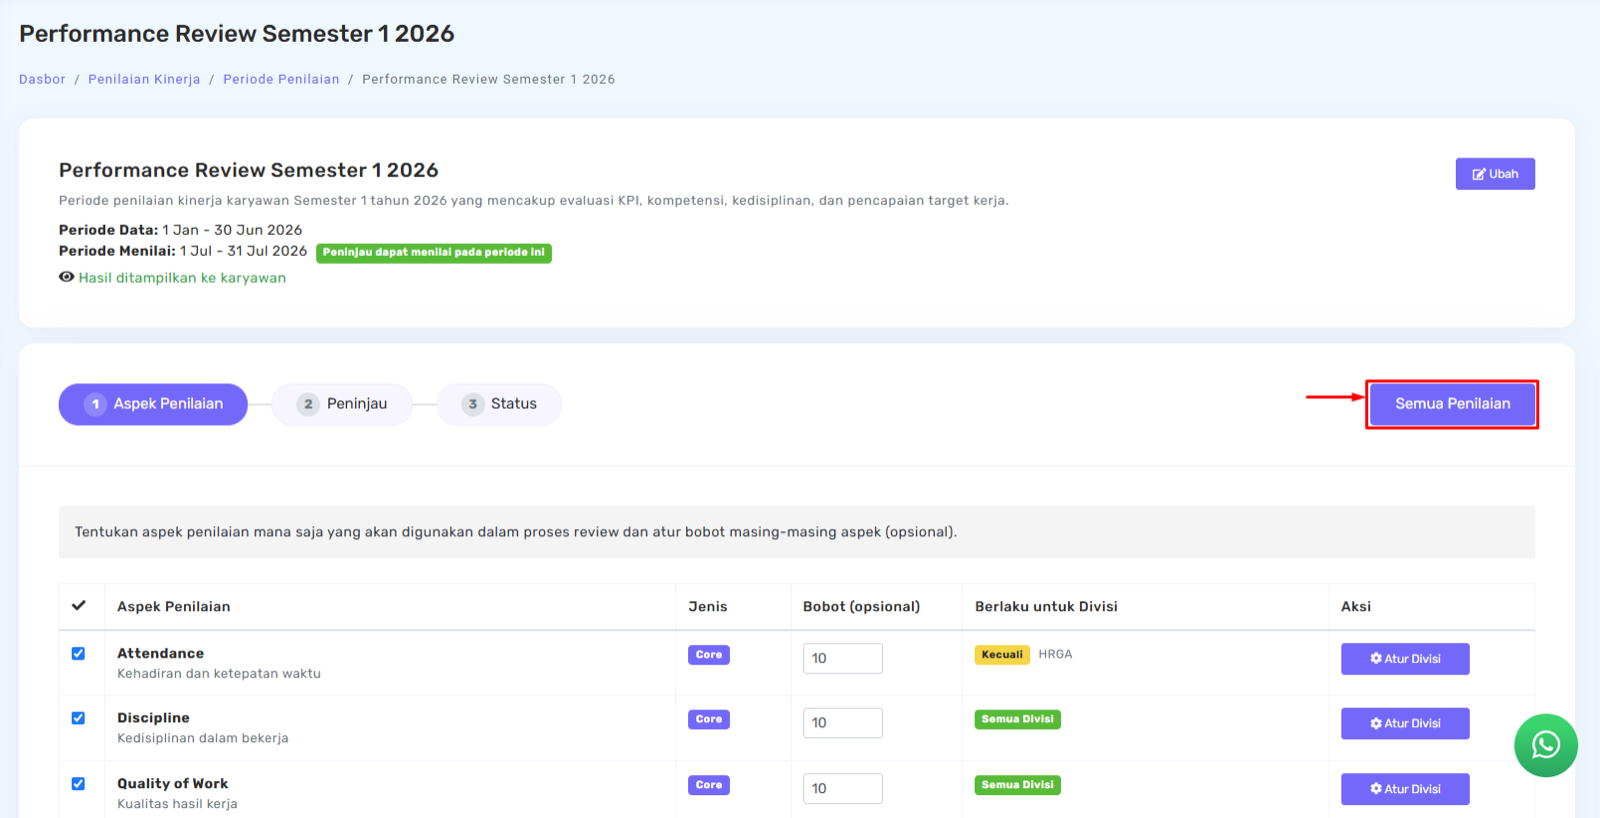
- Click All Reviews for the desired review period.
- View the list of employee review results.
- Select a review to see its details.
- If needed, choose a review and print the results.
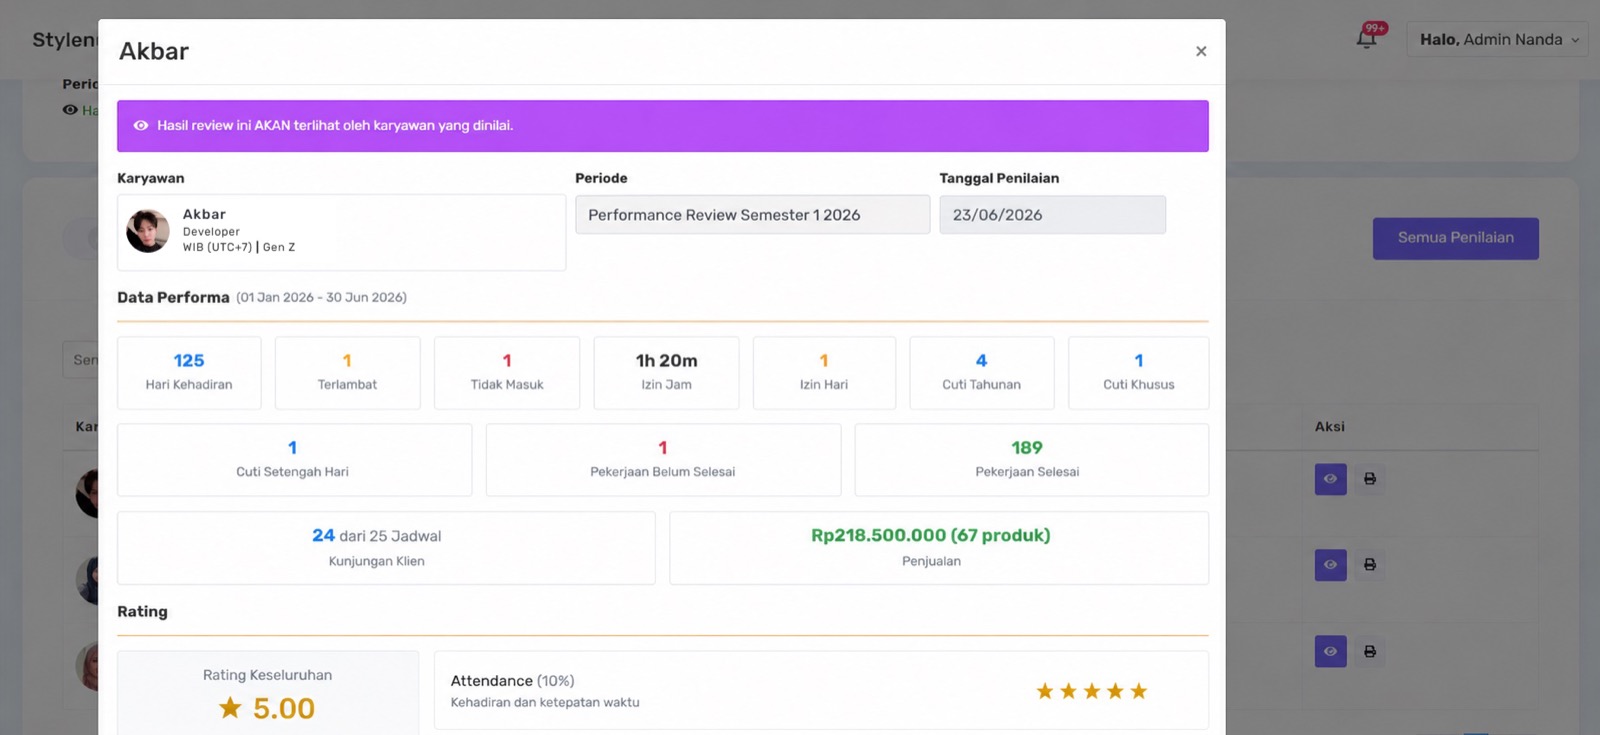
The All Reviews page enables administrators to monitor employee review results, view detailed evaluations, and print review reports whenever required.