Leave Request
A guide to managing employee leave requests, both from the admin side and the employee side.
Follow the steps below to optimally manage employee leave using the Kerjoo system.
How Admins Manage Leave
Access the Kerjoo Dashboard
Log in using your Admin account at https://app.kerjoo.com/#/login via desktop or mobile browser.
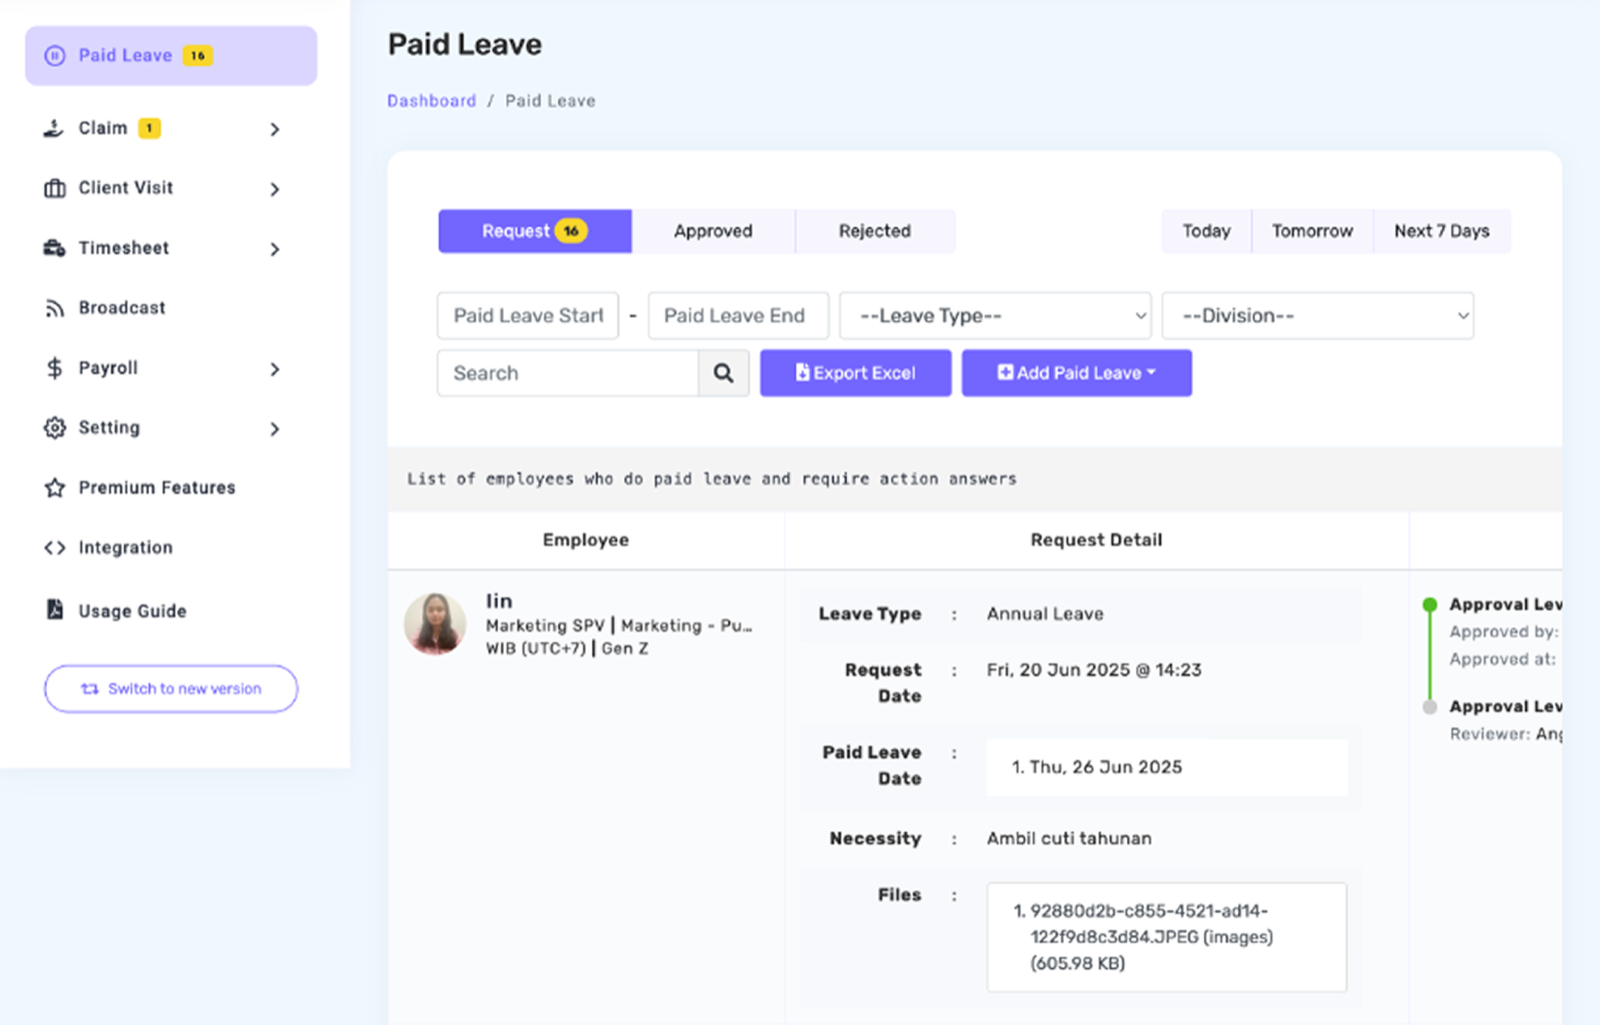
Manually Add Leave
You can manually add leave if the employee has not submitted the request via the app  . Then, select the leave type you want to add, such as Annual Leave, Half-Day Leave, or Special Leave.
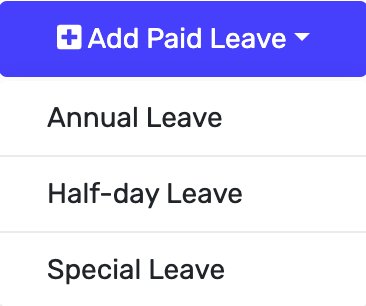
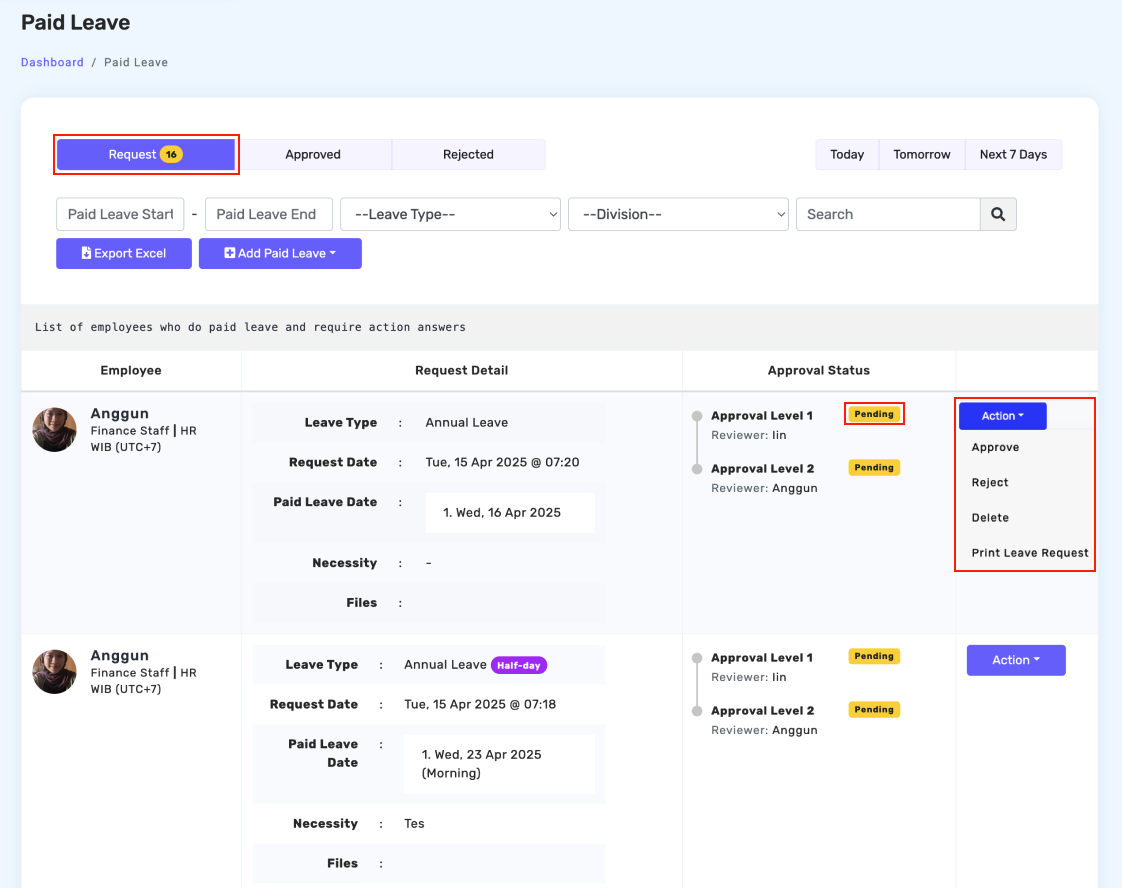
Manual leave entry is useful when the company disables leave requests via the mobile app. The Requests tab displays the list of employees who are submitting leave and waiting for approval.
Approve or Reject Leave Requests
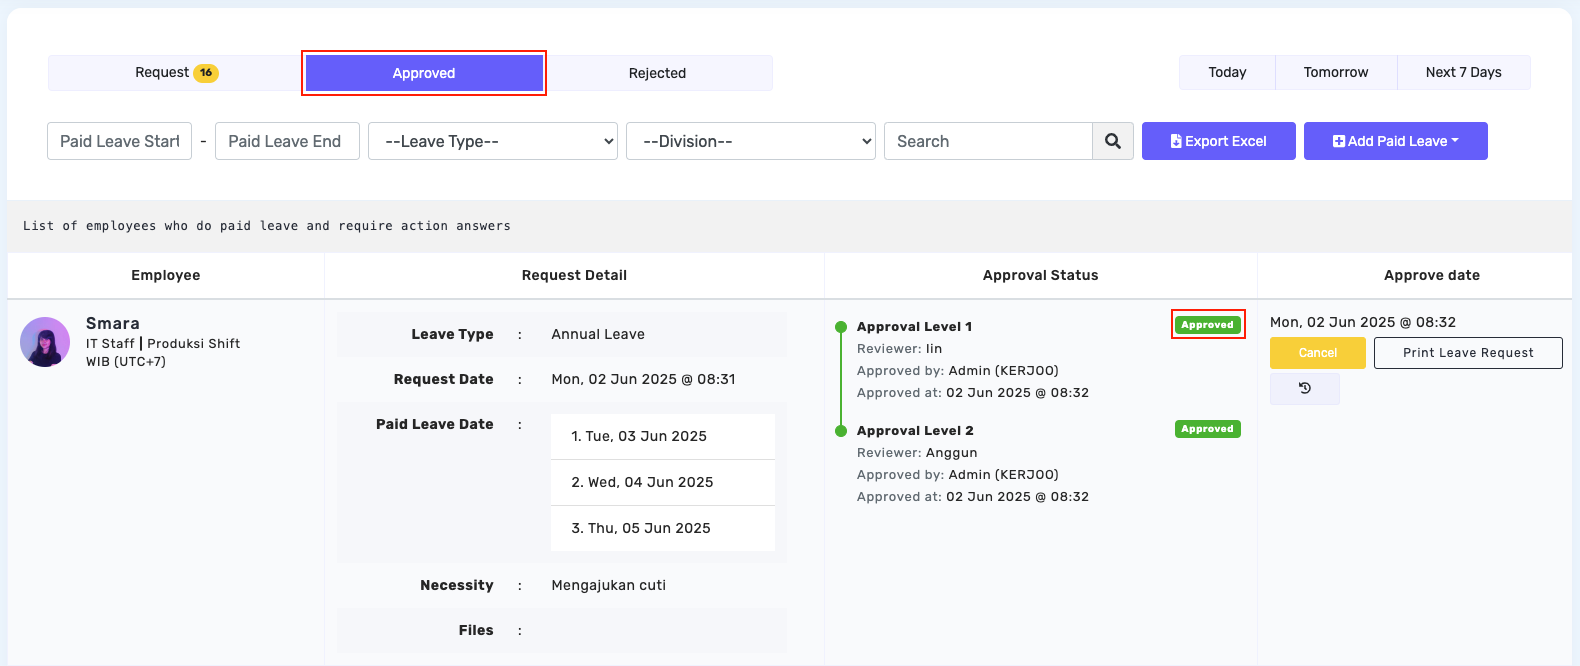
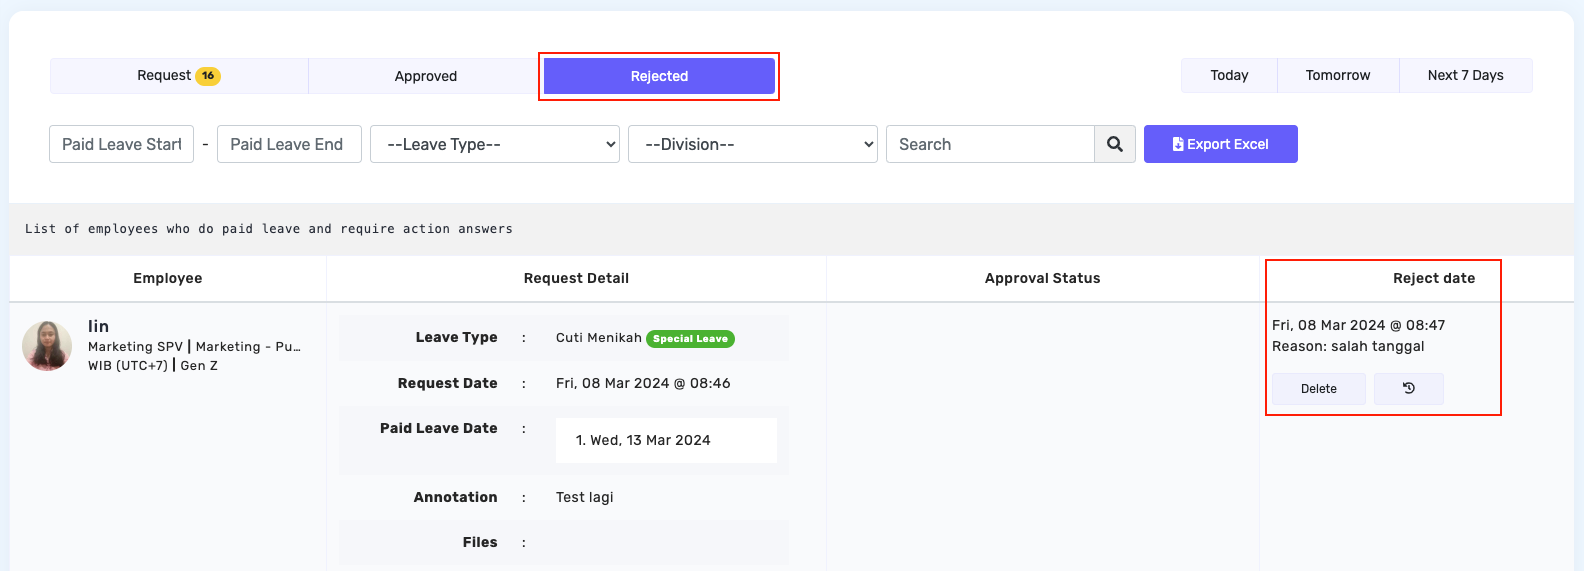
Once leave is submitted, all request statuses appear automatically in the admin panel. You can see which requests are still pending, approved, or rejected.
Monitor Leave for Today, Tomorrow, or the Next Seven Days
To make leave management more effective, you can monitor employees who will be on leave soon using the filter buttons at the top right of the leave page.
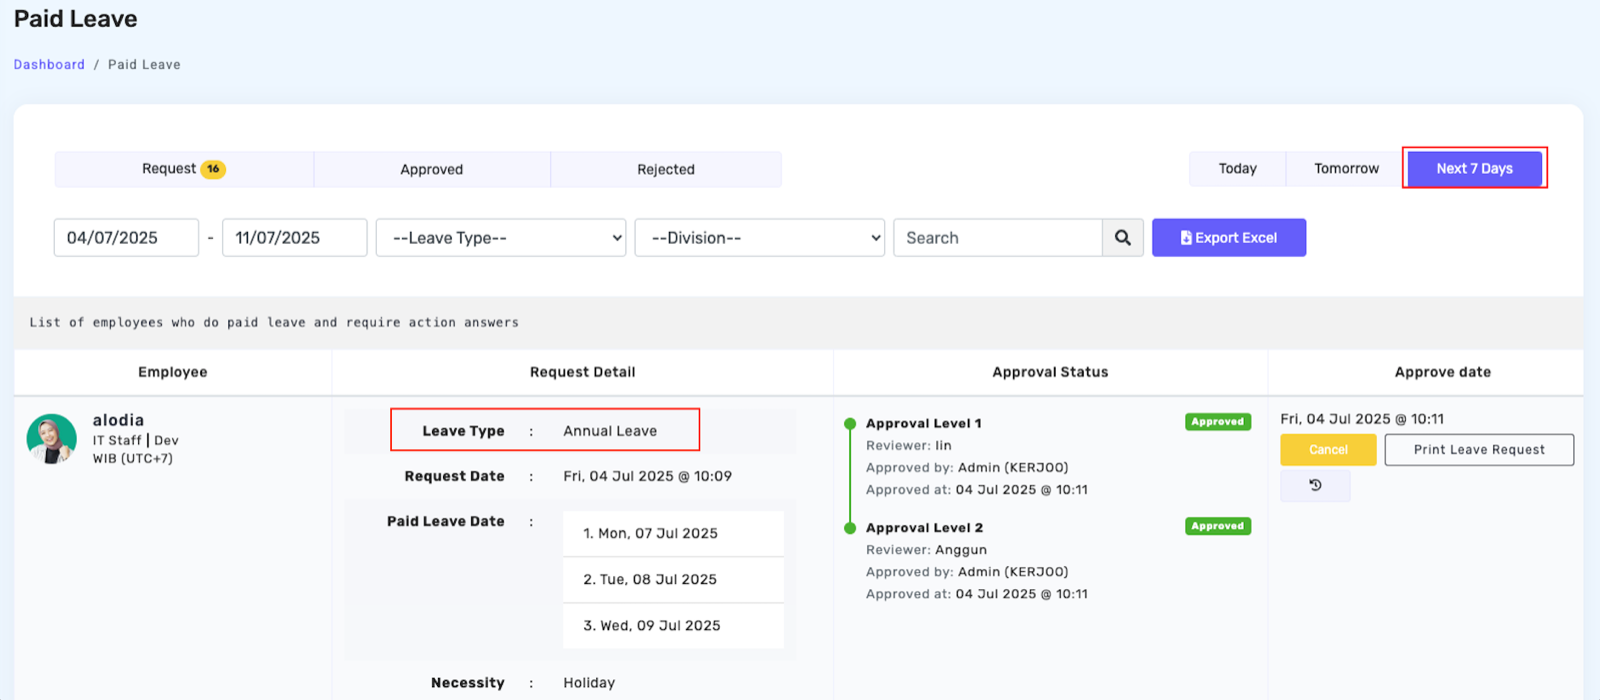
Once clicked, the selected button turns purple to indicate the filter is active. For example, when you select Leave Today, today's leave data is displayed along with the leave type.
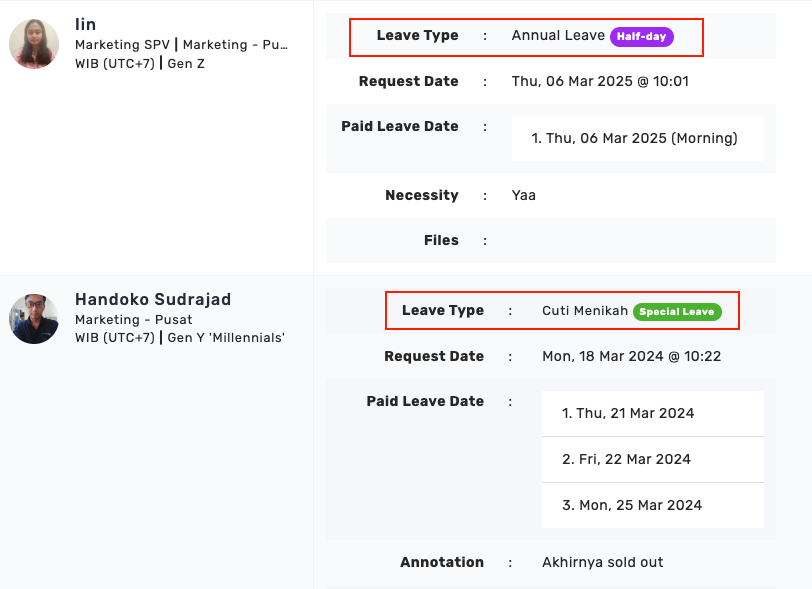
All requests and leave history are also saved automatically. You can monitor employee leave requests by employee name or by division.
Cancel Leave Requests
Leave can also be cancelled if there is a company matter the employee needs to attend, such as a meeting or a client presentation.
To cancel leave, simply click the Cancel Leave 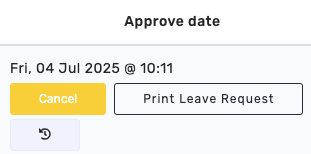 button located at the right corner of the leave request detail view.
How Employees Use the Leave Feature
The Leave feature is also accessible through the mobile app, so employees can request leave anywhere and anytime. Here is a practical guide to requesting leave through the mobile app.
Log in to the Kerjoo App
Open the Kerjoo app on your smartphone, or log in using the email registered by your company admin.
Select the Leave Menu
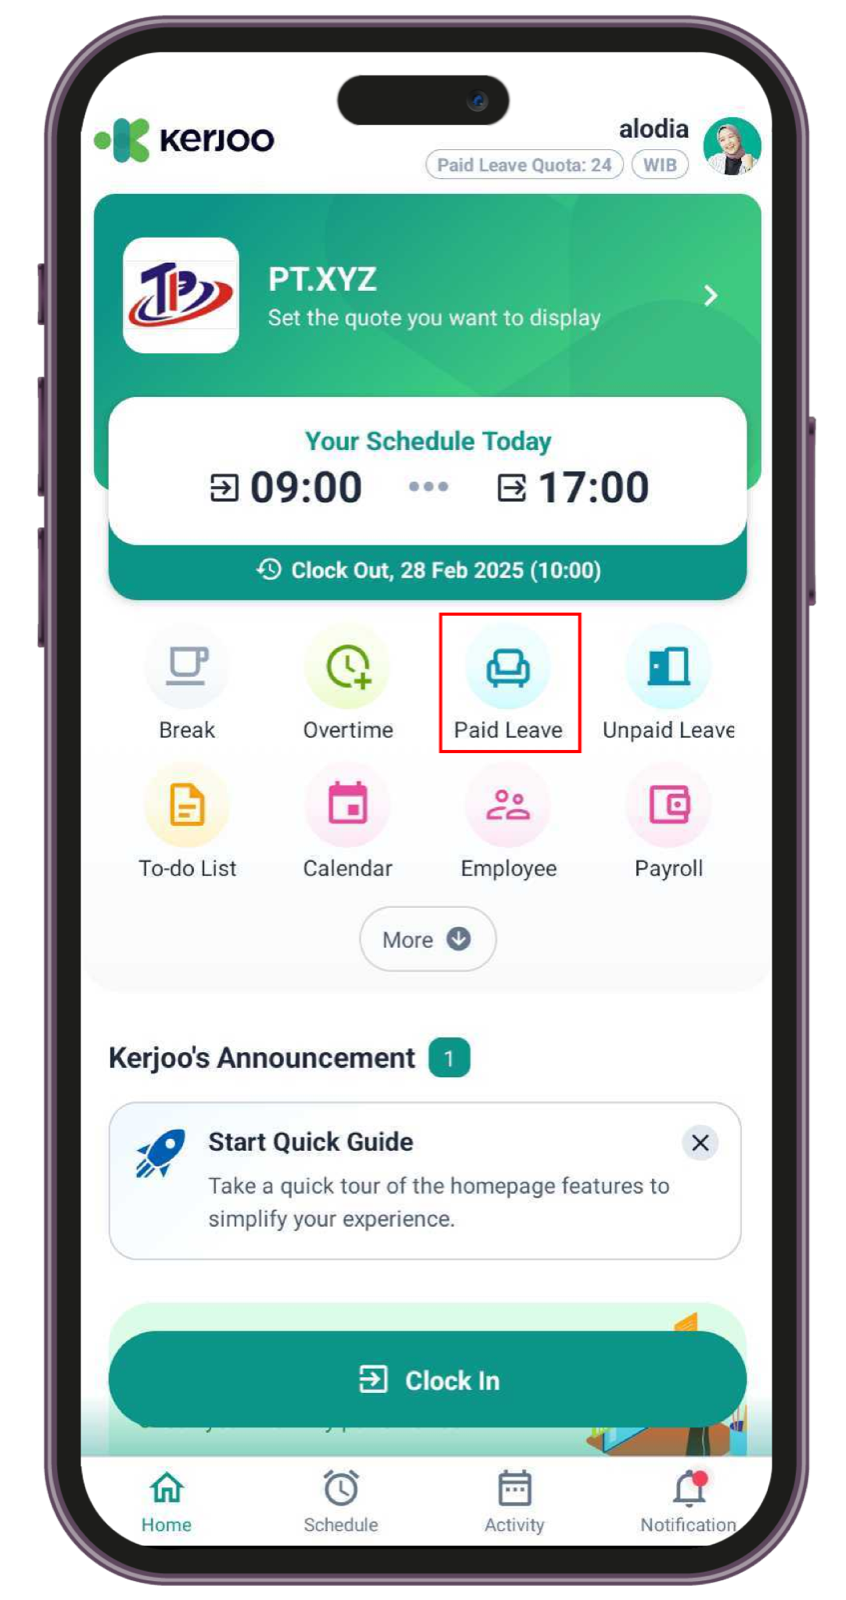
On the app home screen, tap the Leave button. Here you will see the leave types available based on your company's policy.
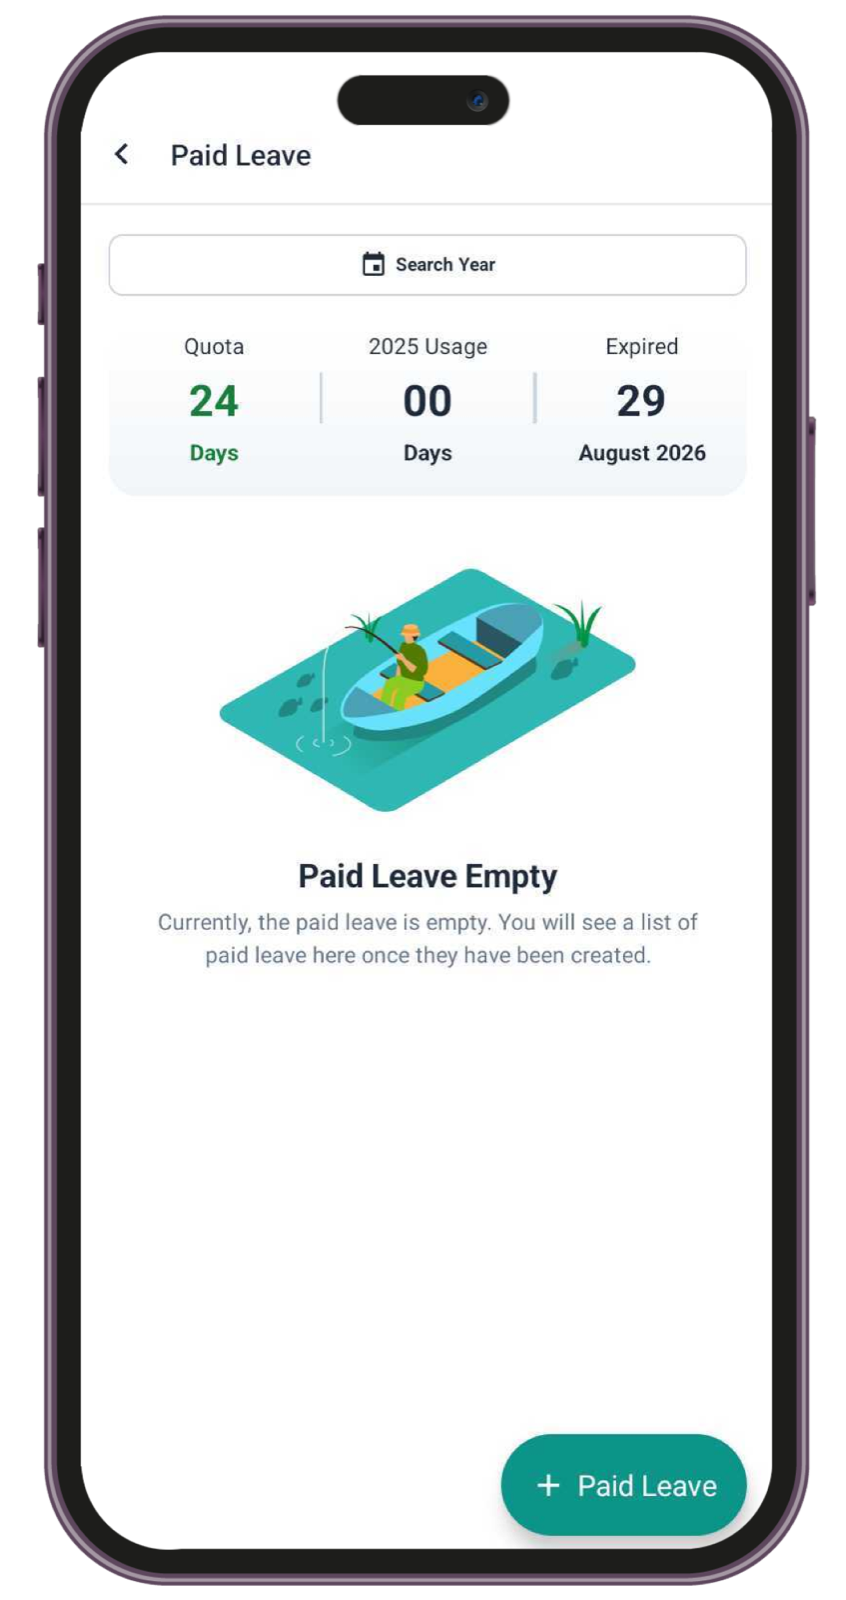
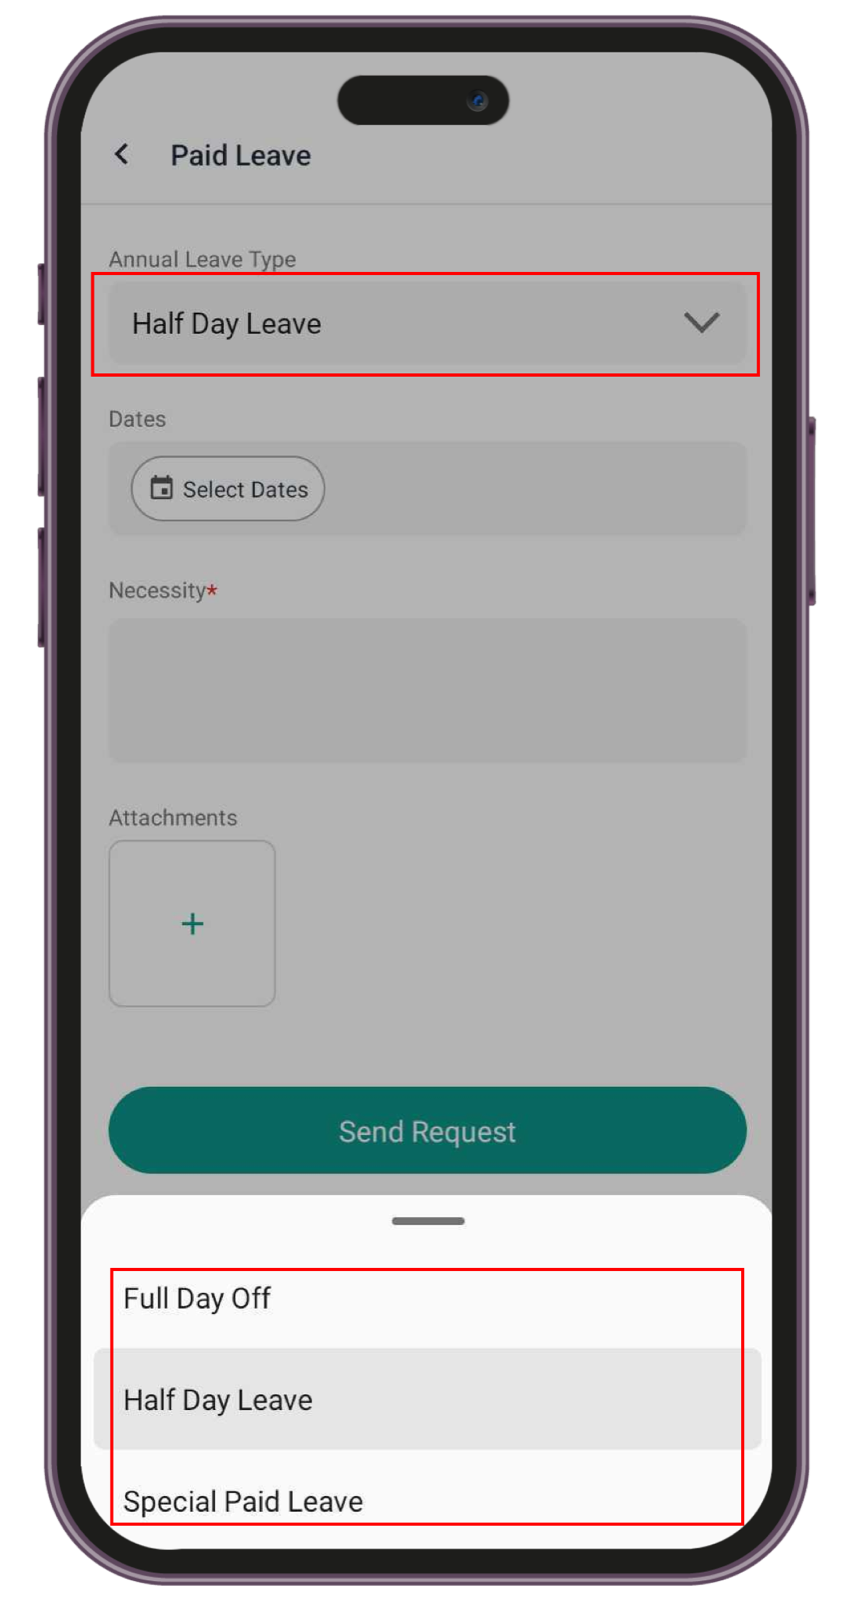
Choose Leave Type and Dates
Select the appropriate leave type (for example Annual Leave, Special Leave, or Half-Day Leave). Then set your leave start and end dates.
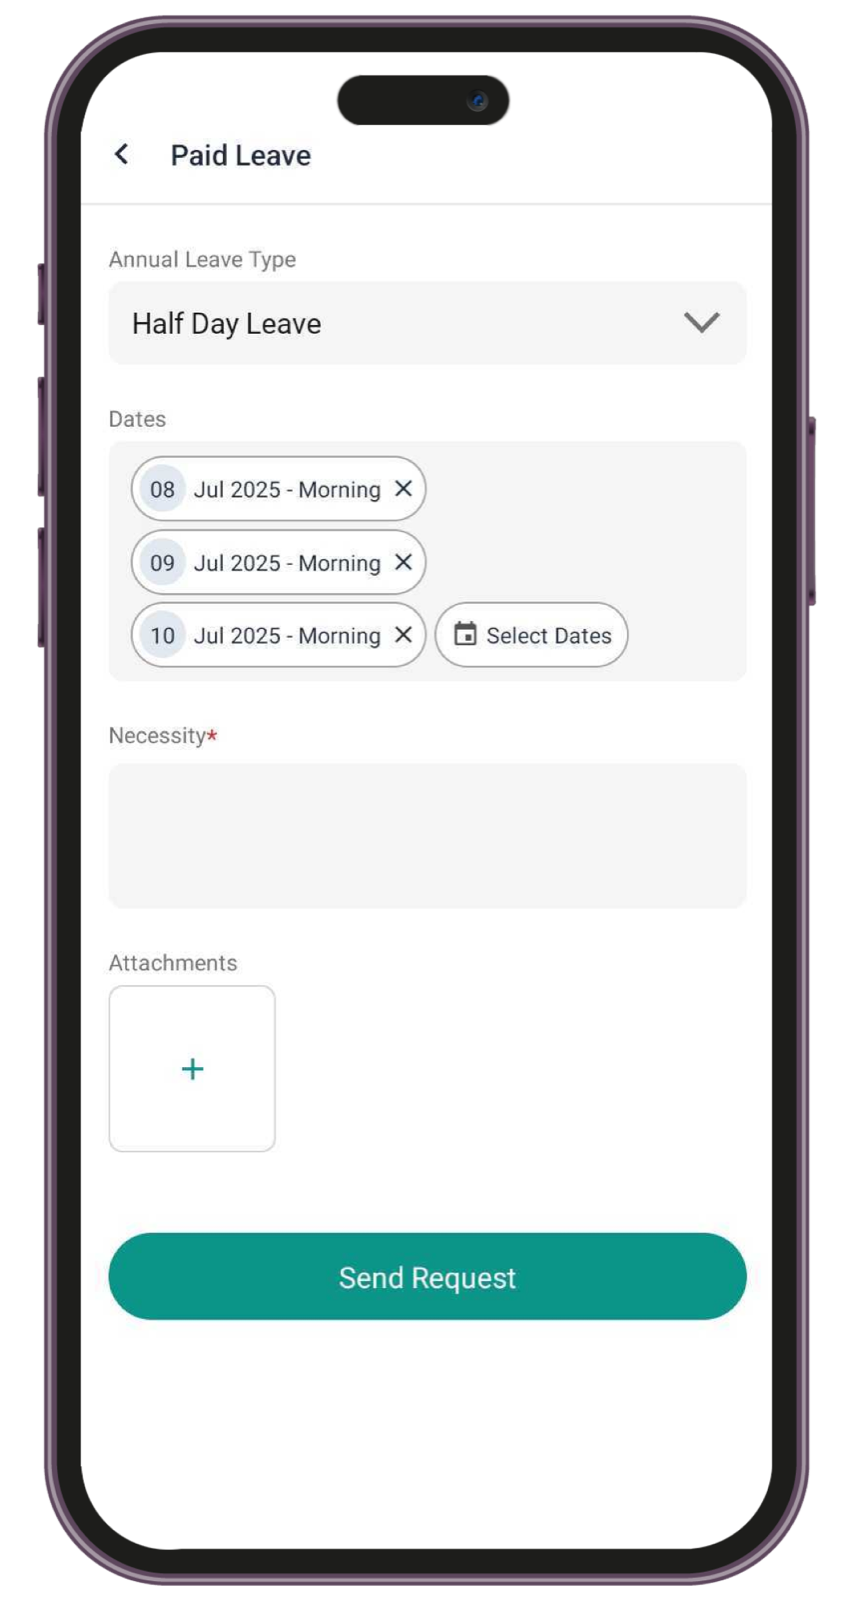
Upload Supporting Documents (If Required)
Some leave types may require documents such as a doctor's note or a wedding invitation. If requested, simply upload the file directly from your phone.
Click Submit and Wait for Approval
Once all the data is complete, click Submit. A notification will be sent immediately to your supervisor or Admin for approval.